Installing and Using a Pee Valve
If you’ve been diving in a dry suit for any length of time, you’ve more than likely had a few dives where you couldn’t get out of the water fast enough to go pee. Adding a discharge valve to your suit is a cheap and easy fix.
A Little Background
The urge to pee is caused by something called immersion diuresis. In short, the cold water causes blood vessels in your extremities to constrict, resulting in an increased volume of blood in your core. Your kidneys then go to work producing urine to reduce the volume.
This phenomenon may just be a minor annoyance, but if your solution is to limit fluid intake before diving, you are increasing the likelihood of DCS.
I dive in 45°F water most of the year, and staying warm enough to prevent immersion diuresis is a challenge. Once I started spending most of my dives with a camera and/or scooter—and subsequently not moving a whole lot—I found I was getting noticeably colder. The urge to pee quickly set in after I started to get chilled, resulting in many unpleasant deco stops. I like to stay hydrated, so I decided to install a pee valve in my High Tide dry suit, which is shown in this article. I’ve since switched to a Waterproof D7 Pro Cordura ISS suit, and adding a valve to that suit was even easier.
How Does it Work
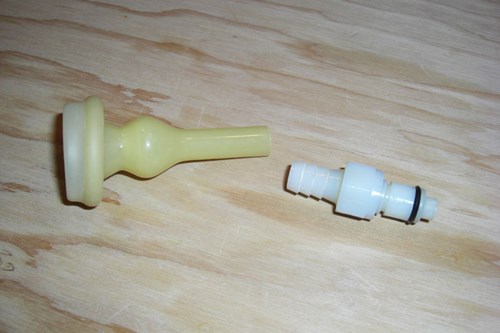
In its most basic form, a pee valve is simply a one-way mushroom valve connected to tubing with a condom catheter on the other end. More expensive “balanced” models include another valve inside the suit to equalize pressure within the tubing and avoid any “squeeze” that might occur with an increase in depth. This generally results in slightly easier use, but also creates an opportunity for leaking if the balance valve fails.
What Valve Should I Get
I originally installed a Halcyon balanced valve in my old Apollo suit, but I upgraded to the High Tide suit soon after and never used the valve. When I finally overcame my reluctance to put a hole in a brand-new new suit, I purchased an OMS balanced valve because it had a slightly smaller form factor. I decided on a Light Monkey “tinkle” valve for my Waterproof suit.
All three valves are functionally equivalent, cost about the same, and are easy to install. Some are lower-profile than others, and some have a threaded cap that allows you to prevent leaks if the mushroom valve fails. When the balancing valve started leaking in my OMS valve, I removed it and plugged the hole, turning it into a non-balanced pee valve. I didn’t notice any difference, so I’m not sure paying extra for a balanced valve is worth it.
Installation
If your suit has a rough outer coating, you’ll need to build up a gasket inside and out to get a good seal. Installing the valve isn’t hard, but mistakes can be costly if you have to pay someone else to fix them. That said, about the only way to mess this up is to put the hole in the wrong place or use the wrong glue.
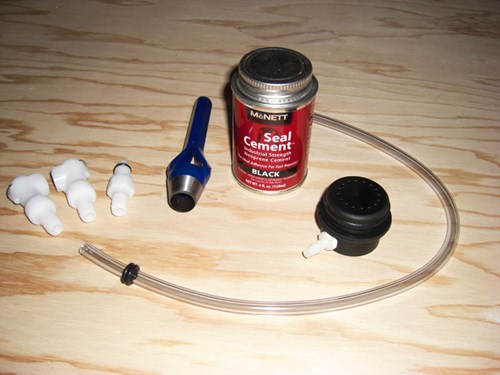
Here’s what you’ll need:
- Your pee valve
- A hole punch (5/8” for the OMS valve); you can also burn or cut the hole, but a punch is cleaner
- A wood block
- Rough sandpaper (e.g. 60-grit)
- Quick-disconnect fittings (optional)
If you are making a glue gasket:
- McNett’s Black Seal Cement or similar
- Duct tape
- An X-Acto knife
- A clamp and wood blocks (optional)
If you don’t need the gasket:
Where to put the hole
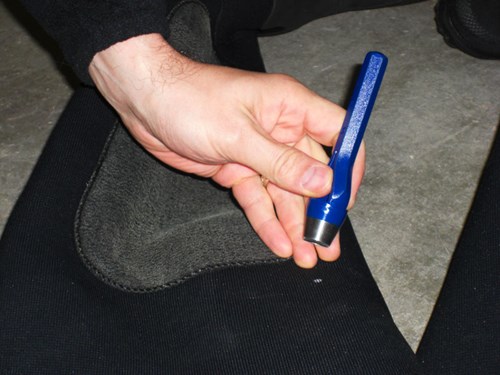
The most common location is on the inner thigh. If you install the valve too high, you won’t have room for the plumbing. If you install it facing your other leg, it might get dislodged when you walk or swim. Therefore, the best location is just above your knee, aimed slightly inward toward your other leg. Stay at least an inch from any seams or patches.
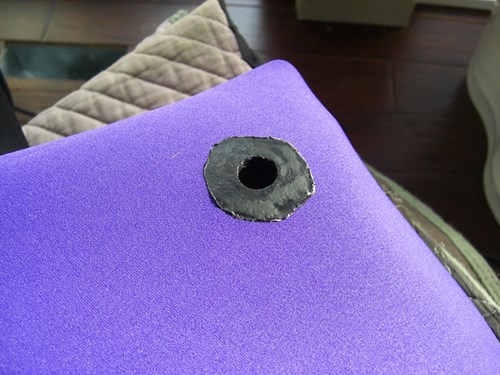
Put your suit on and mark the hole location. Then take the suit off, place a wood block inside behind the hole location, and punch the hole.
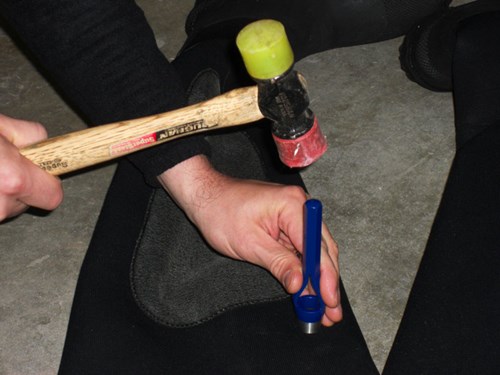
I’ve read of people forgetting the wood block and ending up with two holes in their suit. If you think you’re capable of making this mistake, you might want to think about having someone else install your pee valve. =)
Building a Glue Gasket
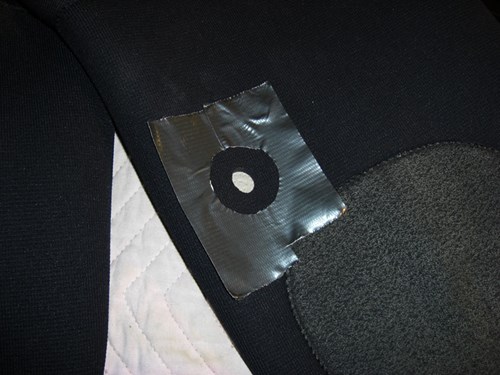
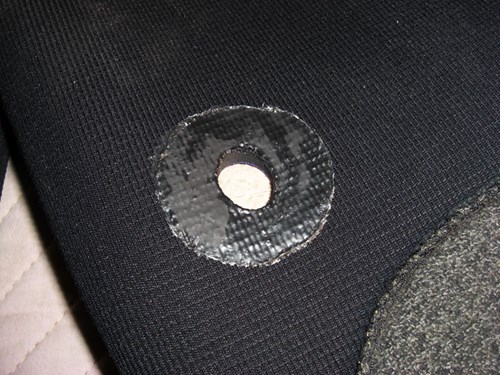
My High Tide suit had a rough armor coating on the outside that would have prevented a good seal. If your suit is relatively smooth, apply RTV to both sides of the valve and screw it on the suit and skip the gasket.
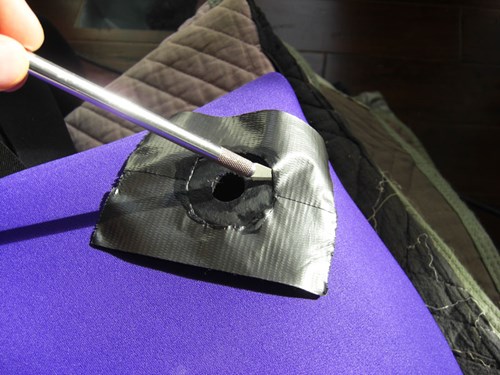
Stick a couple of pieces of duct tape together to form your glue mask. Then cut out a circle that’s the same size as your pee valve and center this over the suit hole. Apply at least three coats of glue, waiting 30 minutes between coats. I used four coats on the outside because the texture of the armor is quite deep. Repeat on the inside, and allow the glue to dry overnight. Once dry, remove the duct tape using the X-Acto knife to cut it free, if necessary. You should now have a nice, clean gasket on the inside and outside of your suit.
Now you want to bond the gasket/flange that came with your pee valve to the gaskets you made on the suit. I highly recommend doing this one side at a time. If you try to glue up the inside and outside at the same time, you are likely going to end up with glue everywhere.
Rough up the suit-side of the valve gasket with the sandpaper. Then put a final assembly coat of glue on the valve gasket and your outside glue gasket.
Wait about five minutes for the glue to become tacky. Press the rubber gasket onto the suit firmly, and place wood blocks outside the suit, inside the suit and under the suit. Clamp the wood blocks together.
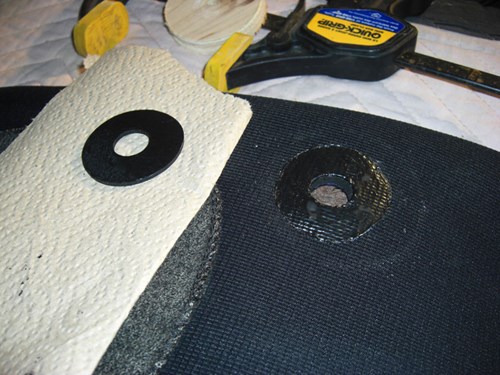
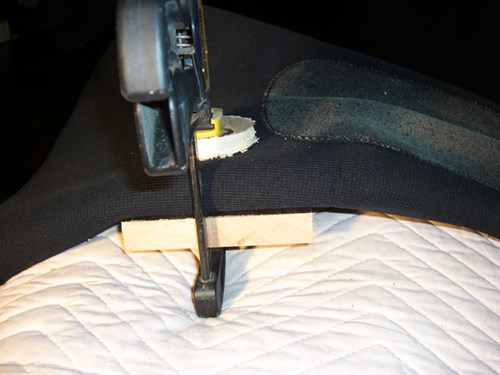
While you could just screw down the two halves of the pee valve at this point, using clamps and wood blocks distributes the pressure and prevents the neoprene from getting crushed. It also keeps the valve from getting glued in place, since you’ll want to be able to remove it later.
Let this sit for 5-10 minutes and repeat for the inside rubber gasket.
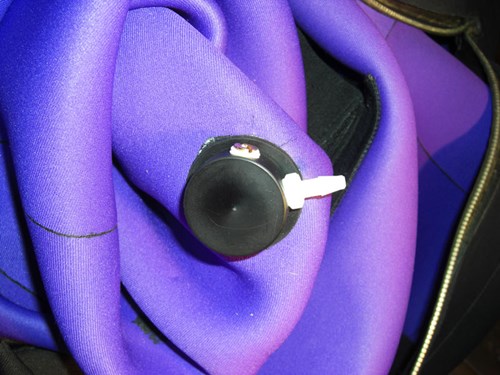
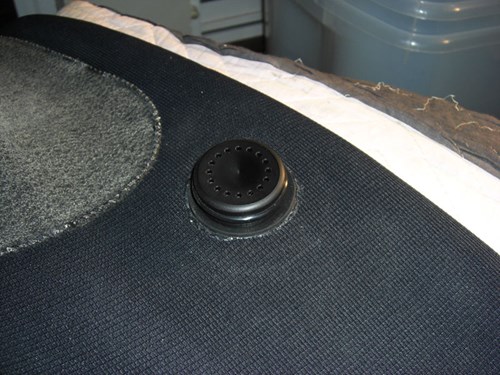
Installing the Valve
Once the two rubber valve gaskets are bonded to your suit, you can screw the two halves of the pee valve together. Just be careful not to over-tighten it and crush the neoprene.
Adding a Quick Disconnect
After installing my new pee valve and using it for the first time, I quickly realized its included “plumbing” had a couple drawbacks:
- At 1/8” ID, I wasn’t terribly confident in its flow rate
- It required some “fishing around” at the dive site to get everything hooked up
Of these, the “fishing around” was the biggest concern. I’m not particularly self-conscious or easily embarrassed, but spending a couple minutes fumbling around “down there” at the dive site ain’t cool. Furthermore, trying to do it while gearing up for a night dive in winter with poor lighting is pretty hard.
After reading some forum posts about this same problem, I learned that some guys add quick-disconnect fittings. This allows you to put on the condom catheter at home and connect it to half the plumbing. Then, at the dive site, you simply “click in”, which is easily done by feel in the dark.
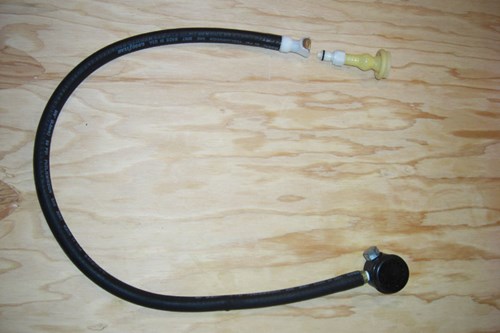
Here’s what it all looks like when assembled. See the end of this post for a full listing of parts.
Update: I now use a 90° fitting on the catheter to make kinking less likely and have switched to silicone catheters to avoid irritation. And I have no qualms about donning or doffing the catheter at the dive site, even in very public locations. =)
Parts List
| Part | McMaster-Carr |
|---|---|
| 3/8” barbed adapter | 5372K116 |
| Male quick-disconnect with shut-off valve | 5012K86 (straight) 5923K84 (90°) |
| Female quick-disconnect with shut-off valve | 5012K83 |
The Tubing
The tiny clear tubing that comes with the pee valve isn’t large enough for quick-disconnect fittings, so I replaced it with black fuel line (3/8” ID). I used about 28 inches of fuel line so I could create a loop near my belly. The loop is important so the plumbing never gets pulled tight, creating strain on the fittings.
Update: Fuel like works great, but is pretty heavy and will eventually wear out and kink. I now use Norprene tubing.
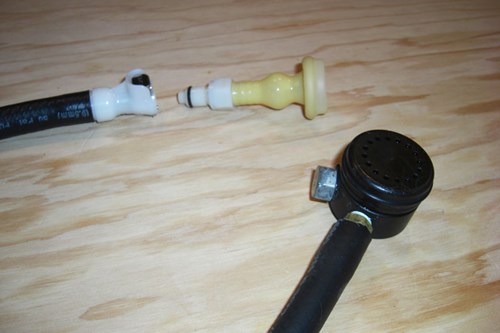
The Fittings
On the valve side, I replaced the 1/4” barbed nylon adapter with a 3/8” brass adapter. I couldn’t find this particular adapter in brass on the McMaster-Carr web site, so I ended up getting it at a local hose and fitting shop.
Tip! Use no more than two wraps of Teflon tape around the threaded end of the adapter, and don’t crank it down so tight you crack the valve housing.
The female quick-disconnect fitting is attached to the tubing, and the male quick-disconnect fitting is attached to the catheter. I found the catheter tips to be a little long, which could result in kinking and fairly predictable “blow-off” immediately after. To avoid this, I trim the tip to roughly equal the barb length.

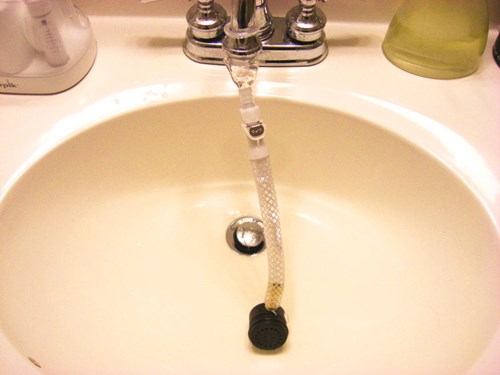
To test the integrity of the plumbing and fittings, I attached a condom catheter to the coupling and wrapped it around my faucet head. Then I let the water flow at a rate I’m pretty sure my “personal plumbing” is not even remotely capable of. Everything worked great with no leaks whatsoever.
The Condom Catheter
Let’s be frank. These things are in no way like the condoms you use for fun. Instead of being lubricated, they have adhesive on the inside that makes them stick to your skin. They come in a variety of sizes and models, but you still roll them on like a normal condom.
Let’s be even more frank. Adhesive sticks to hair even better than it does to skin. You basically have two choices: trim your pubic hair ahead of time or let the catheter do it for you when you try to remove it. I strongly recommend the proactive approach. Seriously.
Like many proud new pee valve owners, I had concerns about “blow-off,” which is when the catheter fails to purge, fills up with urine, and unexpectedly becomes detached from you. In an effort to avoid this nightmare scenario, I used a “wideband” catheter on my first test dive. As the creative name suggests, widebands have a wider band of adhesive for better gripping power. This was a major mistake. Let me just say I spent an extremely unpleasant 30 minutes in a hot bath trying to remove the catheter. If you want more details, read this guy’s post on ScubaBoard. I had almost exactly the same experience.
It turns out that blow-off is probably the last thing you need to worry about. Getting the catheter to release its death grip on your privates after the dive is a much bigger concern. Here are some tips that will make your life much easier:
- Request samples from a manufacturer. They’ll also send you a sizing guide. Set your pride aside and get the right size. Also, be sure to order one XXL “Magnum” catheter in case anyone ever asks to borrow one.
- Trim your hair. And then trim it some more.
- Attach the catheter to the QD fitting first, then to your body.
- When putting the catheter on, only roll back as much as you want to take off later. I’ve found that rolling it back only about an inch and then dusting with baby powder is fine for single dives.
- Before investing in a box of 100 catheters, buy two each of several different kinds and test dive them.
- If you think you might be allergic to latex, get the silicone catheters.
- Have a small towel handy to wrap around everything when disconnecting and removing the catheter. This will prevent any remaining urine from creating an embarrassing wet spot, unless you’re into that sort of thing.